No-Dig Gardening Is Brilliant, But I Made These Mistakes
by Jamie on 13th May 2026 · 5 minutes
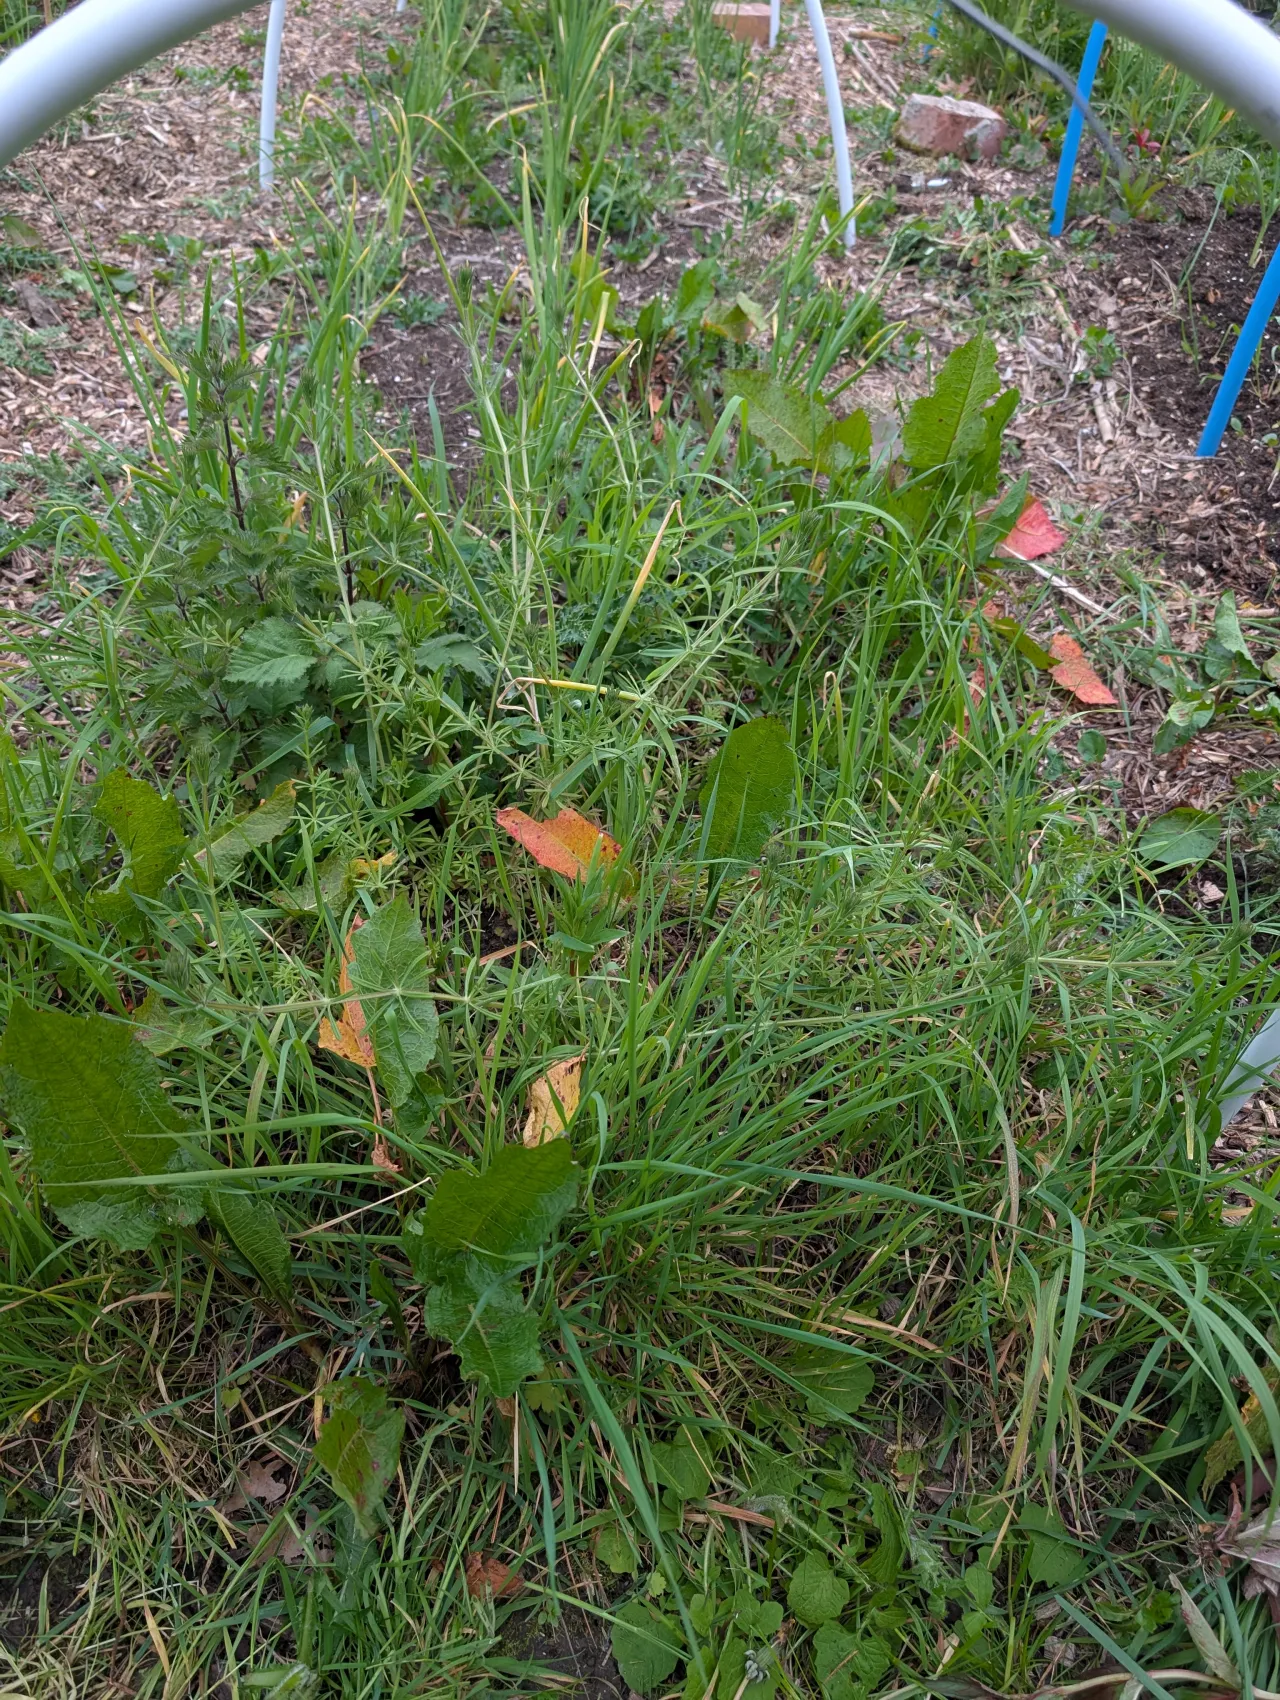
When I took on a new allotment plot, it had been left largely unattended for around five years. It was overgrown, weedy, and not exactly screaming “productive vegetable garden”.
But within a matter of weeks, using no-dig methods, I had transformed sections of it into growing space. Not perfect growing space. Not weed-free, magazine-ready growing space. But usable beds that were good enough to get hundreds of onions planted and growing.
That, for me, is where no-dig really shines.
It gives you a way to start growing quickly without having to spend weeks digging, double-digging, rotavating, or exhausting yourself trying to turn the whole plot over by hand. You can suppress weeds, feed the soil from above, and get crops in the ground far sooner than you might expect.
But no-dig is not magic.
It is not a case of throwing down a bit of cardboard, adding a sprinkle of compost, and expecting every weed problem to disappear forever. I learned that pretty quickly.
Mistake 1: Not removing enough perennial weeds first
One of the biggest lessons from my trial was that perennial weeds need dealing with properly before you cover the ground.
Annual weeds are usually quite easy to suppress with cardboard and mulch. They germinate, they hit darkness, and they give up.
Perennial weeds are different.
Things like docks, couch grass, bindweed, dandelions and thistles have energy stored in their roots. If they are strong enough, they will push back through weak points, gaps, thin mulch, or cardboard that breaks down too quickly.
That does not mean you have to dig the entire plot over. But it does mean it is worth spending time removing the worst perennial weeds before you start.
If I was doing it again, I would focus on digging out the obvious deep-rooted weeds first, especially anything with a big taproot or running root system. I would not worry about making the soil perfect, but I would definitely reduce the pressure before covering it.
Mistake 2: Using cardboard that was too thin in places
Cardboard is one of the most useful parts of starting a no-dig bed, but it needs to be thick enough and well overlapped.
Where I used decent cardboard, overlapped properly, the results were much better. Where the cardboard was too thin, patchy, or broke down too quickly, the weeds found their way through.
This is especially obvious once grass and perennial weeds start reappearing between crops. You can still recover the bed, but it is more work later than doing it properly at the start.
A single flimsy layer is often not enough, especially on rough ground. You want sturdy cardboard, no glossy coatings or plastic tape, and generous overlaps. Think more like roof tiles than a neat jigsaw puzzle. Any gap is an invitation.
Mistake 3: Not using enough compost or mulch on top
The other mistake was being a bit too light with the mulch layer in some areas.
No-dig beds work best when there is a proper depth of material on top. That layer helps block light, weigh the cardboard down, retain moisture, and give you something decent to plant into.
If the layer is too thin, the cardboard dries, shifts, breaks down, or gets breached by weeds. You also end up planting into a shallow layer that does not give young plants much support.
For a new bed over weedy ground, it is worth being generous. A thin scattering of compost might look fine on day one, but it will settle quickly.
Mistake 4: Underestimating the cost of compost
This is the slightly awkward bit about no-dig that does not always get talked about enough.
It can take a lot of compost.
If you are making one small bed, a few bags might be fine. But if you are trying to reclaim a chunk of allotment, the number of 40L or 50L bags needed can get silly very quickly.
For larger areas, a bulk bag may work out much cheaper than buying lots of smaller bags. It is still an upfront cost, but if you can manage the delivery, storage, and moving it around the plot, it can make more sense.
Homemade compost, well-rotted manure, leaf mould and other organic materials can all help too, depending on what you have access to. But if you are starting from scratch and want to plant quickly, you will probably need more material than you think.
## What went right
Despite the mistakes, I still think this was a success.
The plot had been neglected for years. It could easily have taken a full season just to clear and prepare it using more traditional methods. Instead, no-dig let me get growing within weeks.
That is a huge win.
The onions went in and the plot started feeling productive rather than abandoned. Even where weeds have started to reappear, the situation is still manageable.
How I would fix it now
Where weeds are coming through, I would not panic or rip the whole bed apart.
I would remove the worst perennial weeds by hand, getting as much root out as possible.
For paths and edges, I would be especially careful. Weeds often creep in from the sides, so it is worth keeping paths well mulched and making sure bed edges are not left exposed.
If crops are already growing, I would work around them. You do not need to redo everything in one go. You can improve the bed bit by bit through the season.
The lesson
No-dig is excellent, but the setup does matter.
If you are starting a new bed on clean-ish ground, you can probably get away with less preparation. But if you are reclaiming an overgrown plot, especially one full of established weeds, it pays to do the first layer properly.
Remove the worst perennial weeds. Use thick cardboard. Overlap it well. Add more compost or mulch than feels necessary.
Do that, and no-dig can take a rough, neglected patch of ground and turn it into productive growing space surprisingly quickly.
I made the mistakes so you do not have to. But even with those mistakes, I would still choose no-dig again.
Enjoying these tips?
SeedSort helps you plan, track, and grow your garden with ease. Sign up for free and start your own growing journey today.